The first blooms of jasmine kind of make me want to stay in California forever. I love how spring comes alive in a tidal rush here. It’s so different from the trickle of crocus that would spread slowly across our New York garden. I still haven’t quite figured out gardening on our shaded terrace,…
Continue reading ...
We had no particular plan for our drive down Highway 1, with the exception of seeing the ocean. After making it to Big Sur and wandering around the village of Carmel, we decided to stay for an early dinner. Carmel is remarkably pet friendly, meaning there are dogs everywhere. Knowing this, we brought out little dog,…
Continue reading ...
On afternoons when I am working at home, I love to have a pot of soup simmering on the stove. This soup is great because it doesn’t require a lot of prep work and it comes together really quickly. It doesn’t need to cook down for hours because most of the flavor is developed in…
Continue reading ...
I have had chimichurri that is far too vinegary or garlicy, but I think this version strikes a nice balance. For me, it is all about adding some lemon to brighten the flavors and using a mellower vinegar that doesn’t overpower the herbs. Chimichurri is traditionally served in Argentina with steak. I actually used the…
Continue reading ...
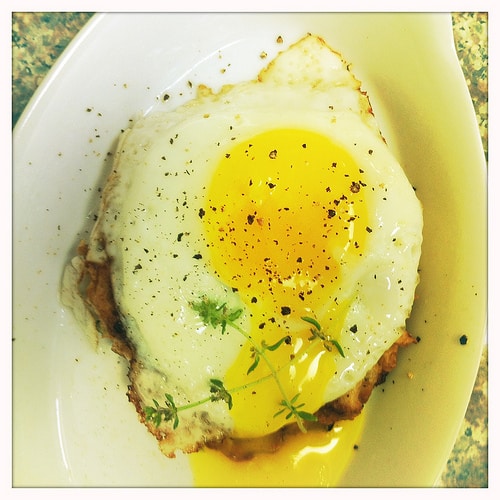
This was breakfast today. Yes, I broke the yolk. This happens in real life. Yesterday, I dropped a whole omelette on the floor so today was an improvement. These turkey sausage patties are actually better the next day making them perfect for reheating. I have a ton of fresh sage and was thinking of a way…
Continue reading ...
I had never even seen Romanesco until it caught my eye at the farmer’s market last weekend. It was in between the cauliflower and broccoli and looked part space age and part dinosaur…of course I had to buy it. Then I saw it over at the Fast Grow the Weeds and at the lovely La Tartine…
Continue reading ...
I like to mix things up for breakfast. I am always on the hunt for healthful and different ideas that often leave J asking, “What exactly IS this?”. Barley, oatmeal, quinoa, it is all fair game on our breakfast table in savory and sweet variations. This only takes a bit more effort than standard oatmeal,…
Continue reading ...
I wanted to make something simple in honor of St. Patrick’s Day. I had seen Ina Garten make this recipe into shortbread fingers on Barefoot Contessa, and then I was reminded of them when I saw them on Brown Eyed Baker’s blog. As with any shortbread, this is all about the butter. I sometimes…
Continue reading ...
I recently saw a pie baked in a cast iron skillet at the King Arthur Flour Blog. This sounded like a pretty fantastic idea and I vowed to try it. The cast iron helped the base layer of the pie bake evenly and warded off any sogginess. It also looked pretty cool and rustic. I…
Continue reading ...
The August 2009 Daring Bakers’ challenge was hosted by Angela of A Spoonful of Sugar and Lorraine of Not Quite Nigella. They chose the spectacular Dobos Torte based on a recipe from Rick Rodgers’ cookbook Kaffeehaus: Exquisite Desserts from the Classic Caffés of Vienna, Budapest, and Prague. There are many birthdays in our families over…
Continue reading ...